Bathroom fixtures

We are having a bit of fun in the bathroom this week. We added the fixtures to the walls and started on the plumbing. The shower controls are on the side wall not under the shower head. This started because the pipes didn’t allow the control to be on the narrow shower head wall. However this was a happy set back as now with the open glass door, we can turn on the shower and not get wet. This is particularly good for when the girls do their swimming lessons and we can help them get in and out without getting wet ourselves.  Win Win!

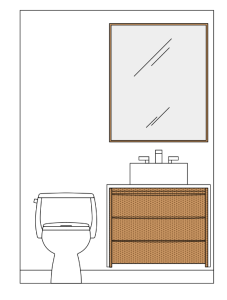
Next was getting the vanity ready. Amber sourced and found this great Mid century modern vanity at Design House. She used the same quartz as the kitchen for the waterfall effect and Ryan built out the cabinet to given enough room for plumbing and the sink. Overall a great effect.

Now on to the fun stuff. The light fixture and the mirror.

Bathroom Beauty

Here is the tiled bathroom! Wow – one thing complete and it is a beauty.  I can’t believe how well it has turned out. This is even without any glass, any finishing, any plumbing, any lighting. Can you imagine how wonderful it’s going to look once it is all in?

We did have a small snag with the tiles though…. Continue reading

Shower addition

We are getting over closer to having our downstairs bathroom finished. The framing and plumbing is complete. The drywall is done, now for the sealing and painting, the concrete base, the fixture placement, you know little stuff.

But in the meantime, here are the updated shower pictures.

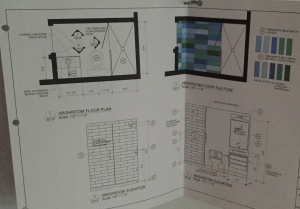
The tiling is going to be next up. Here is a copy of the updated tiling grid that we were planning on putting on the floor.

IMG_7112

IMG_7116

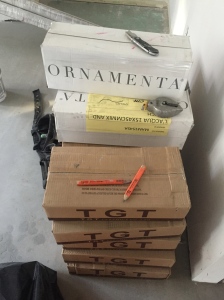
The bathroom floor tiles finally arrived this week from Italy but when the guys unpacked it, they noticed that the tiles were all off size by varying of portions of cm.

Handcut tiles

Hand cut tiles

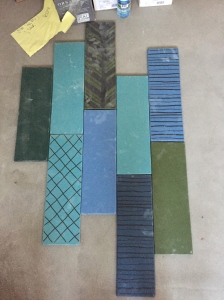
This is really screwing with our grid formula for the floor. Now we have to either have variation in the grout lines or stagger the tiles instead of making a grid. Something like this:

Staggered tiles

Staggered tiles

It’s still very pretty, just not as geometric. Hmm decisions.

I think we will end up with the staggering, but I’m still brainstorming with the team. Any suggestions out there?

Let’s Check in…

I was feeling a bit nostalgic today with all the big changes I saw at the condo this week. I went back to my original post and looked at my “must have” list. Wow, things have changed. Let’s take a look.

Our Must Haves:

  1. Open concept kitchen with an island √
  2. Replace the hardwood floors throughout √
  3. Expand to two full bathrooms √
  4. Have a great play area for the kids
  5. Update the design to suit us  √

We are slowly but surely ticking things off our list. We haven’t decided completely about the kids play area yet, but we are looking into a few storage options. Stay tuned for a post about their bedroom and playroom. The girls are very excited about it.

But what else has spiralled out of adding a bathroom and tearing out the kitchen?

Our new additions:

  1. Open the stairwell to let in light
  2. Change the glass to a floating glass system throughout the stairwell
  3. Change the glass on the loft balcony to match the stairwell
  4. Add new lighting throughout the house/add recessed lighting ceilings
  5. Add heated floors
  6. Add a workstation for homework and crafts and adult work at home days
  7. Add organizational systems to the closets downstairs
  8. Open up/widen the doorway between the kitchen and living room
  9. Add AV and electrical to make it a “smart home” since the walls are already open
  10. Paint everything!

I always heard that a reno is more like a living organism than a static project but now that I reflect on it, it is really clear.

Plumbing System Pass

Inspection #2 Passed!!

After the electrician got his portion done, the plumbers finished all the drainage for both the kitchen and the bathroom as well the water supply for the coffee machine, fridge, new toilet, vanity, and shower valve.

The city came in to check out the work and now both inspections have passed with flying colours. The Boyes Brothers deliver on quality and timeliness yet again!

Now to put in the required vessels so we can actually turn on the water…then Brad will be excited too. 🙂

This means that all the foundations for the condo are laid. The electric and plumbing is done and the drywall is now up and holes are being plugged. The ceilings are painted and the walls are primed. Now everything gets to be put back together. We should start seeing some really big visual changes in the next 2 weeks. I can’t wait to show it to everyone.

The Ceiling

Things are looking up. Literally.

Billy and his crew have been working hard at the things that can be done while we are waiting for the final authorization from our strata to start the plumbing. This includes some electrical and drywall and my favourite – getting rid of the popcorn stucco ceiling!

It was everywhere, including the loft. I wasn’t sure how they would get to that area to flatten it out and paint it etc, but Billy assured me it would be fine. Here are pictures of how he did it. Brilliant and safe!

This slideshow requires JavaScript.

He also did the “easier” ceilings like the bedrooms, the dining room, the kitchen etc.

Here are the after shots:

Billy is also reframing the ceiling in the kitchen and the stairwell so we can have better lighting in these areas. I just went shopping with Amber to look for our other light fixtures. I’ll post those pics very soon. Stay tuned!

Bathroom Update

So with the plumbing snag in the kitchen, there was also a little snag with the bathroom as well. The floor was ultra-sounded and there was an electrical conduit in the way of the shower drain. This meant that the shower base that we wanted originally had to be scrapped. But this did lead to a more exciting option – the cement base. I was worried we would have to do tile bottom instead. We have small tiles for the base in our corner shower now ( the tiny, tiny shower – did I mention that already?) and it is incredibly hard to clean. I really don’t want that for our downstairs bathroom if I can help it. I would end up spending all my time trying to make it look presentable. I’m very happy to have the subway tile for the sides, but the tiny squares that would be needed to help with drainage on the floor is really the bane of my existence. So, thank you Billy for suggesting the alternative.

However, moving the drain also means needing to make the shower bigger. That’s good news but also means the whole bathroom needs to be 6 inches bigger to fit the toilet and sink. That isn’t terrible news in itself, but it does really cut into the entry closet. I’m not sure how that is going to work yet, but I have faith that Amber will make it work. I’m also secretly crossing my fingers that maybe Billy can make the walls slightly thinner or have another magic trick to give us as much space as possible in both places 🙂

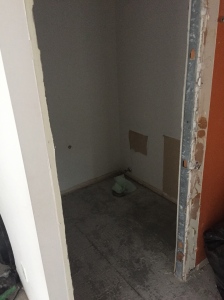
Here are the up-to-date pictures of the demolition and remodel of the downstairs bathroom.

1. Starting out:

2. The equipment is removed

Powder room - equipment removed

Powder room – equipment removed

3. The walls are removed and the floor is marked and ready for plumbing

3. The framing is put up

4. The drywall is mostly in!

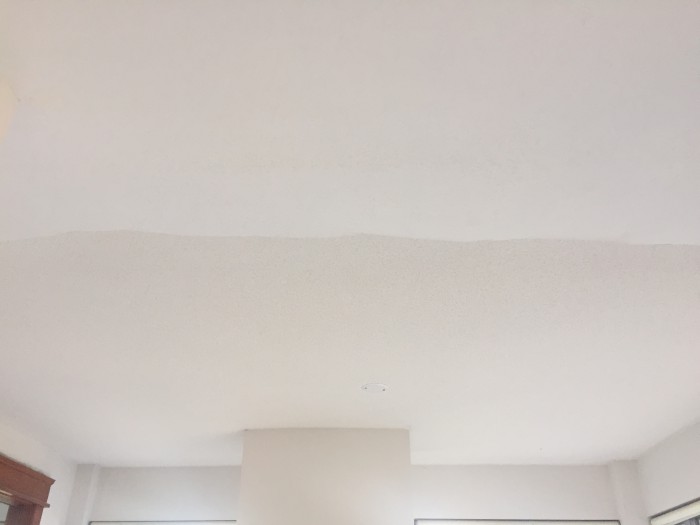
It’s looking pretty good.  You can really see how the bathroom is going to look when it is all done.  I’m very excited. You can also see here the ceiling has been scraped of the popcorn stucco and the bulk head is now flat instead of wavy!  I’m still worried about the closet, but I’m also ok with getting rid of it if need be. Let’s see what happens when the dry wall and doors go in. It is also needs a bit of light 🙂

Demolition day!

The day we have been waiting for!

I can’t believe how much pre-work has to go into planning a renovation on your own home. First finding the right people (that part was easy – Amber and Billy are second to none). Then applying for strata approval. In our case we had to apply to a residential and a commercial strata – fun times. Then after the strata gives approval, the city application is due.  So many steps. Luckily, my team did all the work in writing and securing the applications and proposed plans. That was a welcome surprise. I thought I would be dealing with the approval process.

Then just when you have conditional approval from all parties, you need to wait for the city inspector to come. That was actually the longest part for us.  The city was amazing in getting us the building plans within 24 hours, then getting the application approved within a week – big shout out to Vancouver City Hall!  Things were moving along at a good clip. Then we were told the inspector would come in the next week. I was flabbergasted. Where were all the horror stories of delays and crotchety people who won’t even look up from their papers? Then we waited for the call for the confirmed time for inspection and… it never came.  We waited and waited and called and waited and tried to be polite, and then after 2.5 weeks, the inspector came and gave his stamp of approval.  Yeah!! We can start tearing this place apart!

It feels so good to know we can do the reno we want to do. I did have a lot of worries that either the strata or the city would say no.  It is a big deal to core into the cement floor and the ceiling of the business downstairs, but everyone said yes. Someone is looking out for us for sure 🙂

Positive thinking

Positive thinking

So Billy got the good news on a Friday night and got his crew ready over the weekend and was ready to rock and roll on Monday. They didn’t waste a minute and had the place wiped clean in just 2 days. It was time consuming and needed a lot of planning during the days to get it done right and within the regulations. There is a yoga studio below us and apparently jack hammering interferes with savasana and ujjayi etc… Who knew Yoga. So Billy was only allowed to jackhammer for 15 min every hour. Not disruptive at all.

But with the crew’s hard work and determination. It was done.  We were cleared to come look at it now that all safety concerns were out-of-the-way. And here it is. I can’t honestly say that my first thought when I walked into the space wasn’t “OMG, what have we done!” But after the first few seconds of panic, we were so excited to see the clean slate and get ready for the next step.  Bring it on!

This slideshow requires JavaScript.
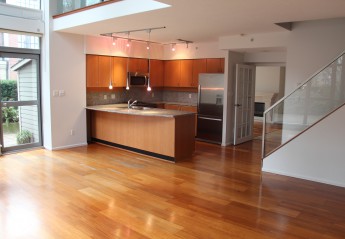
The Powder Room gets a shower

This was one of my must haves. With three girls in the house, we need two full bathrooms. We also want a place that multiple people can shower at the same time when we have visitors. We had a few ideas of how to add a second shower in this condo when we first bought the place (see this post for details). Now that we actually own it and have access every day – what a cool feeling by the way – we have been able to sit in the space and really brainstorm with our team about how to accomplish this.

There were so many things to consider and we didn’t make this decision lightly. Our first choice was to have two showers upstairs. This would be best for the girls as they become teenagers and for guests staying overnight but we just couldn’t find the space without losing a bedroom.  We couldn’t move the plumbing to the open space and if we put in the laundry room, then we would have cut into the smallest bedroom only leaving enough room for a twin bed. I’m assuming the two girls will want their own rooms at some point and we will need that third bedroom. So that left keeping the shower downstairs. We have the plumbing set up in the powder room, so that is the easiest option to expand. The only thing we need to cut into in this scenario is the hall closet. We have a small closet now, so that didn’t matter that much to us. We keep the girls’ coats in their rooms now so they can have the responsibility to hang them up when they get home. I think we will just keep this going with this.

This will also give the living room an extra wall as well and the chance to smooth out the ceiling overhang that right now is scalloped – (why? I have no idea). So that’s the plan right now.

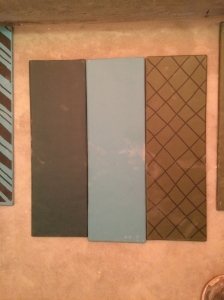
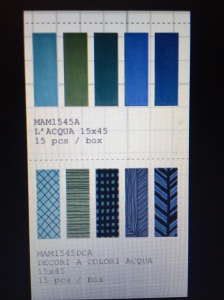
We are using a plain white subway tile for the shower itself with a cement base. This will tie in with the granite counters in the kitchen and have a smooth finish. We are very excited. I wanted to have a punch of colour in here though as well. We are going to bring this in with a really fun floor. Here is the link to the tiles. They are from Ornamenta. I can’t wait to mix and match the solids and patterns. The colours are gorgeous and zen like.

Bathroom Tile

Bathroom Tile

We also want to have a vintage feel. We are going to use a recycled vintage table as the vanity. It will have granite overtop to protect the wood and bring the shelves out far enough to have storage in front of the pipes. Very excited! The last touch of colour will be the red vintage mirror light.

I had to have red in there somewhere!

Vanity Inspiration

Vanity Inspiration