I’m mostly writing this blog for my family and friends who mostly live over 7000km away from me but I’d love to share the experience with anyone else who’s interested. This will hopefully keep them in the loop, but allow me to have some fun and memories of the process. I hear renos can be very tedious with lots of awful decision-making and conflicts/fights between spouses….none of which we will experience I’m sure (insert sarcasm here). But I do think my husband and I have very similar design tastes and are usually pretty reasonable when it comes to making a practical and quick decision. I guess we are about to be tested. Hopefully it’s a good test 🙂
First I thought it would be a good idea to show you the current configuration of our house. As you will be able to see, it is quite lovely already and I would be happy to move in as it except that I have been waiting for 11 years for this house. So I have had a loooong time to dream up what I want in MY place. I don’t want to feel like I moved into yet another rental that I am now allowed to paint. I want it to feel like us, and that’s not easy. I will tell you about our design inspirations in a later post, but let’s say that the hubbie and I like things a little different and definitely colourful.
So, here’s the house.
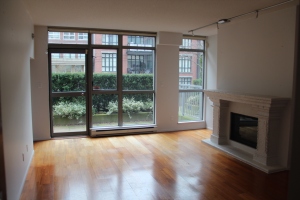
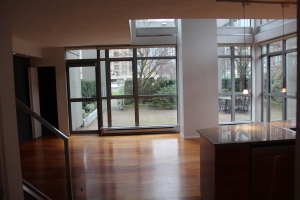
The living room.

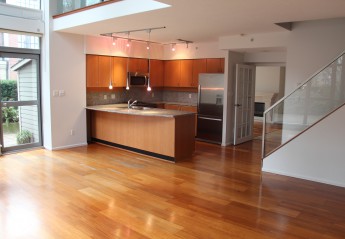
The view of the kitchen looking into the living room
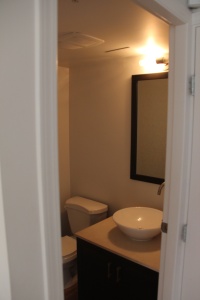
The powder room
Our bottom floor is actually on the second floor of the condo building and opens onto the roof of a heritage building (so no chance of ruining our garden or view with a future building – yeah!) The entry opens into a big room with a fireplace. This used to be a dining room, but we are going to switch it up and have the living room here. It also has a powder room that we want to expand into a full bathroom (more on that later – this will be a pressure point). There is a doorway to the left that then leads into the kitchen/dining room/work area open concept room. The whole bottom floor is accessible to the wrap around patio outside and has floor to ceiling windows, so lots of light and plants. This is a real plus for us. The place we have now has no outdoor space, so having a place to enjoy a coffee outside in the morning is going to be wonderful.
The dining room looking outside
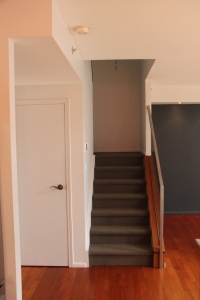
The stairs/landing area
Up the stairs then opens onto the kids’ play area. It is fairly big and with a bit of creative storage, will hopefully keep all the kids gear at bay, or at least not be underfoot when guests are over (anyone who’s stepped on many tiny legos will know what I mean!)
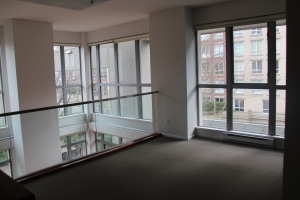
The play area and loft
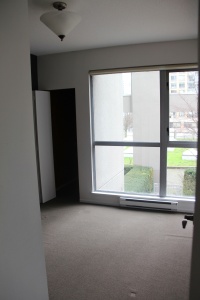
Then there are three bedrooms on the upper floor as well as a laundry room. There isn’t an official en suite, but the two bathrooms from the original condo were previously renovated into one large bathroom. I don’t really want to separate it unless we have to (i.e. when we have two teen girls fighting over one vanity – then I may change my tune). It has two doors and plenty of room, so hopefully it will be good for a few years especially with an added shower downstairs for emergencies or when guests stay over.
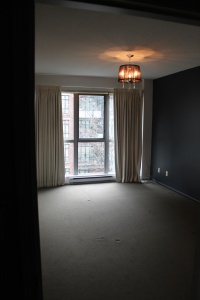
The master bedroom
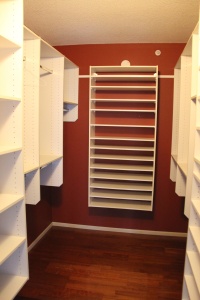
My/(Our) walk-in closet!
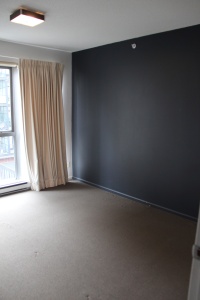
The girls new bedroom
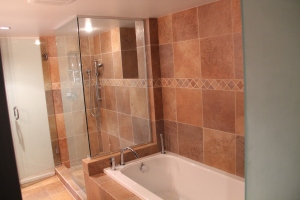
The upstairs bathroom
I’m also quite excited about all the storage in this house. There is a huge walk-in master closet, multiple other walk-in closets off the living and dining rooms and even a pantry next to the kitchen. It will be weird not having a downstairs storage area, but we should have plenty of storage without needing it elsewhere. I even have a shoe rack in my closet (every girl’s dream I think!).
The patio outside is great. We can see it from anywhere in the kitchen and can see the side part from the living room. It will be great to let the kids just go outside and play on the patio, use chalk, ride their scooters, have a mini pool etc. It’s going to be a godsend this summer.
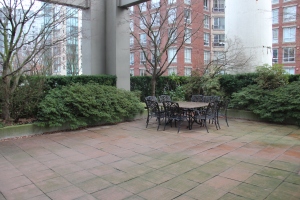
Looking out onto our patio
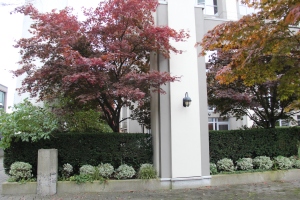
The common area looking onto our trees and patio
The girls have also decided they want bunk beds, which means they will share a room. This gives us a real guest room for the first time in our lives. We already have a lot of visitors (did I mention Vancouver is a great city?) but we would love for them to keep coming and for more people to come stay with us. We LOVE our visitors! We will probably put a desk in here as well so that it becomes multifunctional for when guests aren’t here.
The guest bedroom
Well, that’s it. A run down of the place so far. We have lots of ideas, but need a tonne of help to make them work and tie everything together. Stay tuned to meet our amazing team – that’s where the magic will happen.